If you had asked me a year ago whether I planned to get into 3D printing, I would’ve laughed. It was never something I thought I’d need—or even want. But life (and homelabbing) has a funny way of nudging you into new hobbies.
Why a 3D Printer?
My journey started with a simple goal: organize my growing homelab. After collecting a few mini PCs and a managed switch, I realized I needed a way to mount and display everything neatly. It had to be accessible for maintenance and also look decent sitting on a shelf.
Like most modern DIY problems, I turned to Reddit and YouTube. The options generally boiled down to three:
- Buy a prebuilt 10-inch rack (from DeskPi, Amazon, etc.)
- DIY a rack using metal inserts and brackets
- Design and 3D print a custom mini rack
You already know which option I went for.
From Box to Benchy
What pushed me over the edge wasn’t just the rack—it was the potential. 3D printing felt like a skill worth learning. The possibilities stretched far beyond one project. Once you’re in, you can build and customize almost anything.
At the time, Bambu Lab printers were getting a ton of praise. They made the whole experience incredibly user-friendly, removing the typical 3D printing headaches. No need to endlessly calibrate, no complex tuning—just click a few buttons and print. As a beginner, this sounded like the perfect entry point.
And it was. Within two hours of unboxing, I printed a Benchy from my phone using their app. No complicated setup. No YouTube rabbit holes just to get started. It worked, straight out of the box.
The Mini Rack That Wasn’t
With printer in hand, I set out to design my own mini server rack.
That plan failed quickly.
I was new to CAD and bit off more than I could chew. I tried using Onshape but struggled with the learning curve. After several failed attempts, I decided to print an existing model I found online. It wasn’t ideal, but it got the job done and gave me time to regroup.
Still, I wasn’t ready to give up on design.
A New Challenge: Build a Mini Gaming PC
At the same time, Black Friday was approaching. I’d never experienced real PC gaming—my teenage years were spent on a very underpowered laptop. This felt like the right moment to change that.
But rather than build a standard desktop, I set myself a new challenge: make it small. Less than 5 liters in volume. For context, a typical ATX tower sits around 25 liters and up. I wanted something truly compact.
Here’s the parts list I snagged during the sales:
- MSI GeForce RTX 3050 LP
- ASUS ROG Strix B760-I
- Crucial Pro DDR5 RAM, 32 GB
- WD BLACK SN850X 1TB NVMe SSD
- Intel Core i5-12400F
- Noctua NH-L9i 17xx CPU cooler
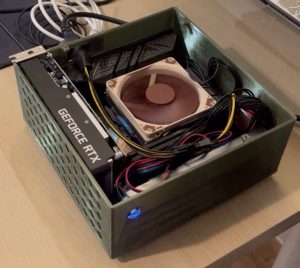
It’s not a powerhouse, but it’s a huge leap from what I was gaming on before. Plus, the real challenge was never the specs—it was building a tiny case that fit all of it.
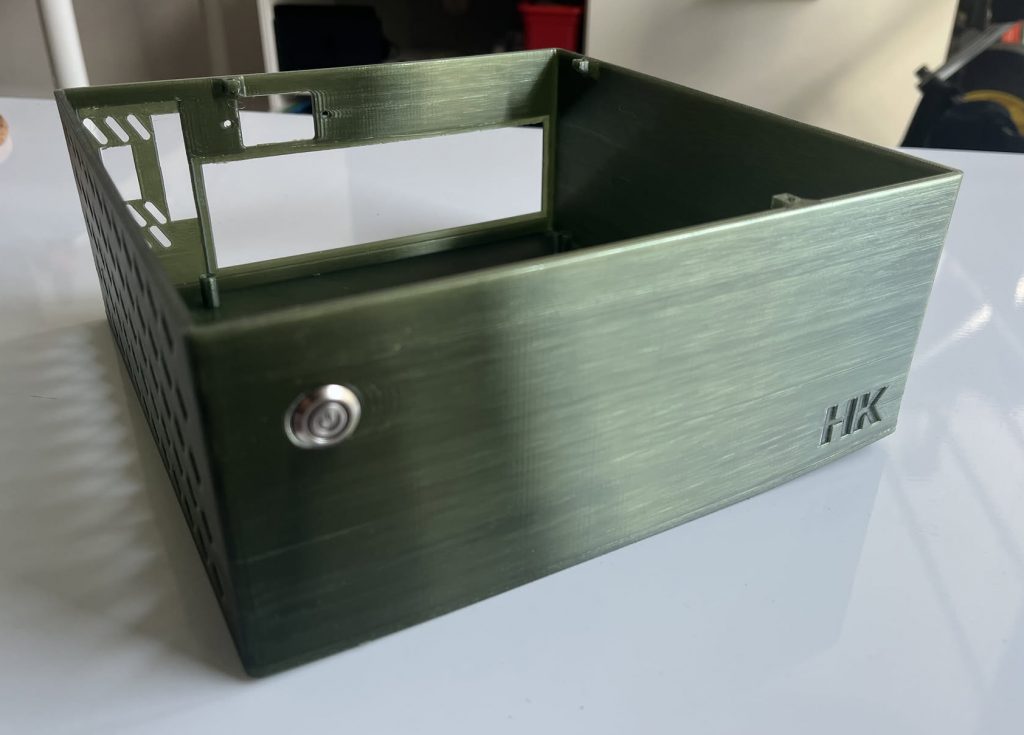
Designing My First Case
Armed with Onshape, I gave myself a second shot at CAD. I studied tons of videos, downloaded reference models, and learned from existing community-made case files (links coming soon). I also tested smaller designs to get used to tolerances and part fits.
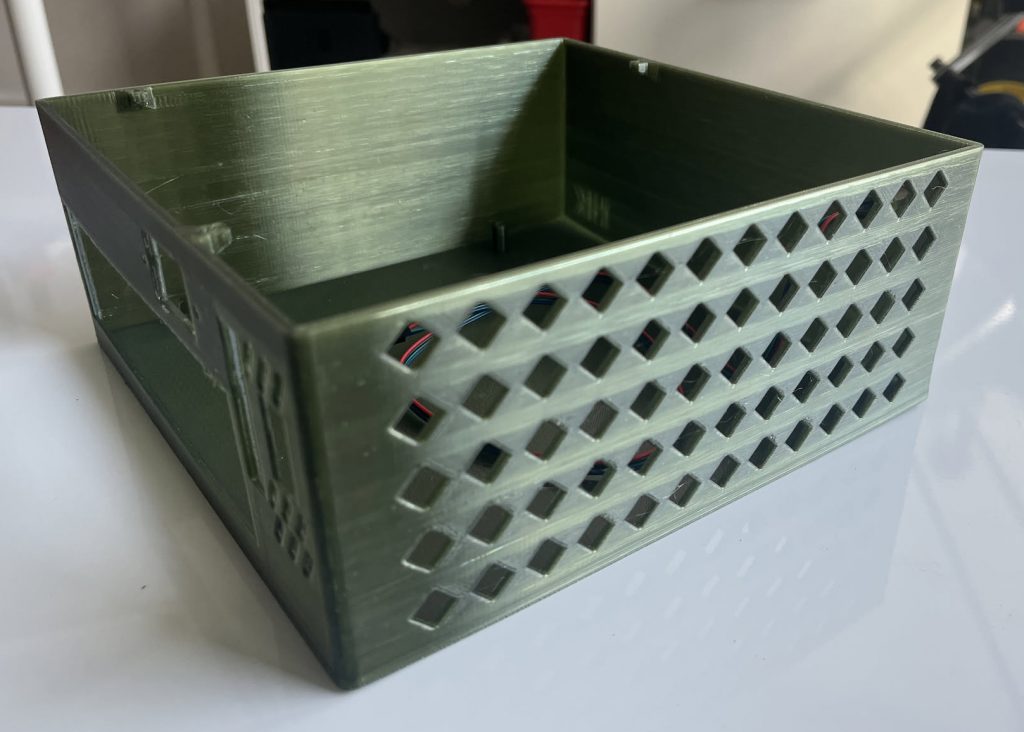
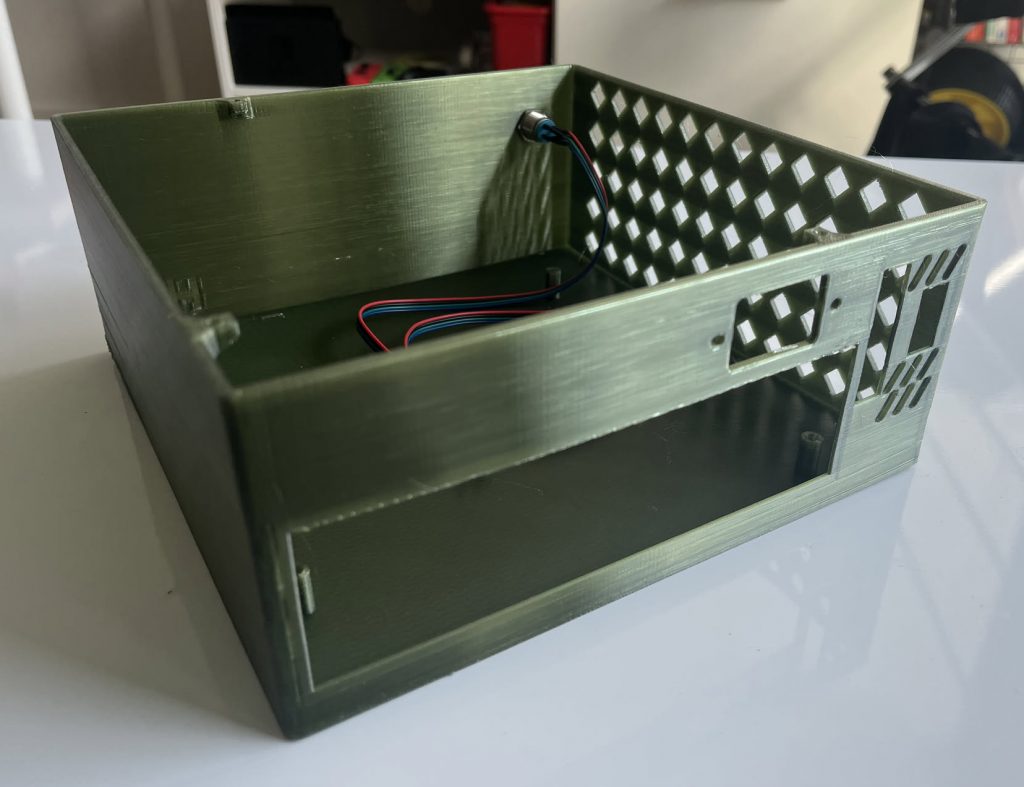
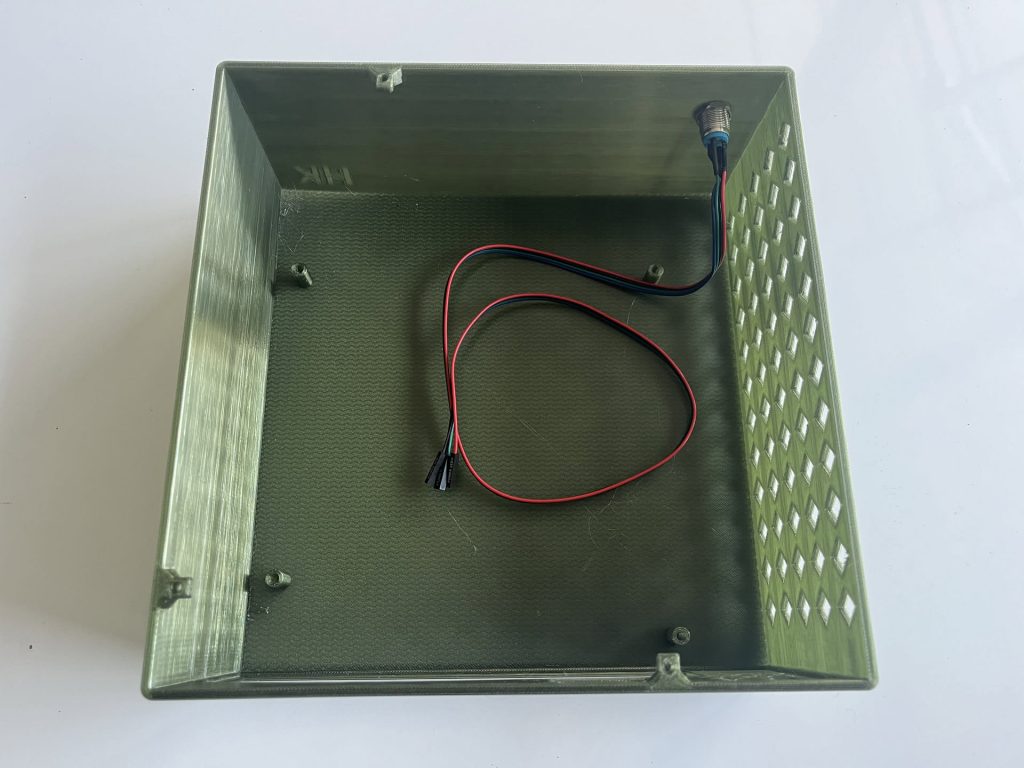
Eventually, I dove into creating the full case. It was a basic two-part design: a base to hold the components and a cover to enclose everything. The base alone took 18+ hours to print, which was nerve-wracking, but it came out mostly fine.
And yes, I printed it in PETG, not PLA. That decision alone probably saved me from early failure, thanks to all the community advice warning about PLA’s heat issues.
Lessons and Mistakes
- CAD is hard, and I still have a long way to go. I assumed a lot, forgot to consider airflow, and learned the hard way that trapped hot air is a real issue.
- Watch others first. Research saved me countless hours. Learning from other people’s successes and failures was invaluable.
- Design with airflow in mind. The biggest flaw in my current build is ventilation. Version 2 will include more intake and exhaust vents to help cool the components.
- Split your prints. In version 1, I only had two parts: base and cover. Great for simplicity, not so great if something fails 12 hours in. For version 3, I’m planning to break it into more modular sections to make reprints faster and less wasteful.
Final Thoughts
This 3D printing adventure started with a rack I couldn’t build, and somehow ended with a custom PC case. Along the way, I learned a ton about design, materials, and my own limits.
And honestly, that’s the best part. I didn’t expect to become a “maker,” but here I am—already sketching out new project ideas and improvements for version two.
Whether you’re into homelabs, PCs, or just like building cool stuff, 3D printing has a way of pulling you in. You start with one project. Then the printer starts printing ideas of its own.